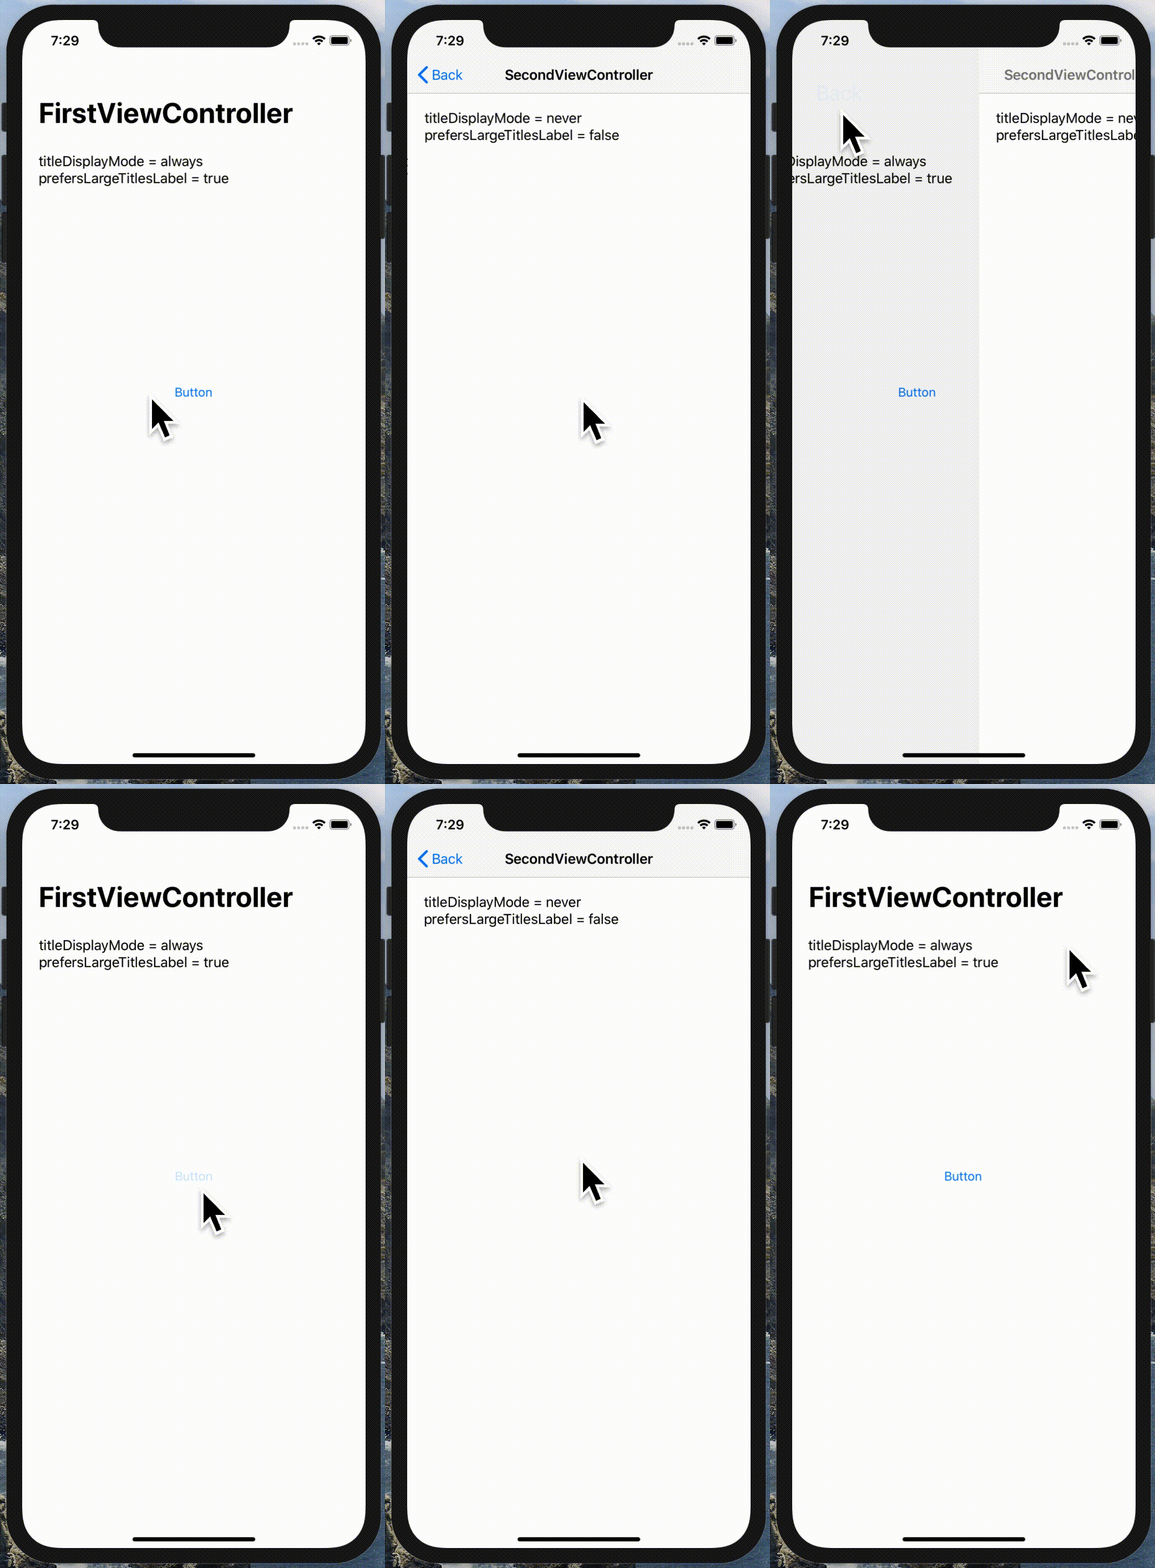
On iOS13 you might start to have your app, or have seen other apps having this issue where the large title animation isn’t animating. Instead, it stays on the pushed view controller for a split seconds before disappearing.

This problem actually already exist in iOS12.2, iOS11
The animation is broken in the other way around where if you go back from the SecondViewController to the FirstViewController the largeTitle will take some time to appear.
Why? When?
To have a ViewController displaying its title as large you have multiple ways to achieve it:
- Only use
prefersLargeTitleswith.automaticand FirstViewController usingprefersLargeTitles = trueand the SecondViewController usingfalse. - Override
largeTitleDisplayModeandprefersLargeTitles. The FirstViewController using.alwaysandtruewhile the SecondViewController using.neverandfalse.
What does the documentation says?
“When large titles are available, this property controls how the navigation bar displays the navigation item’s title. The default value of this property is UINavigationItem.LargeTitleDisplayMode.automatic, which causes the title to use the same styling as the previously displayed navigation item. You can change the value of this property to force the navigation bar to display a large title (UINavigationItem.LargeTitleDisplayMode.always) or a small title (UINavigationItem.LargeTitleDisplayMode.never) for this item.”
- The default value of
largeTitleDisplayModeis to have.automaticandprefersLargeTitlesisfalse. .automaticactually means that it will use the previous state, so if it’s large it will use large, if it’s small it will use small.
An one of the most important part of the documentation says:
“If the prefersLargeTitles property of the navigation bar is false, this property has no effect and the navigation item’s title is always displayed as a small title.”
How to fix it?
If overriding largeTitleDisplayMode
If you are using navigationItem.largeTitleDisplayMode you basically always have to set prefersLargeTitles property to be true.
The reason is in the documentation itself, if this property is false then largeTitleDisplayMode has no effect, and it will always use the small title which will break the animation.
When relying on .automatic
The easiest way would be to be explicit and use largeTitleDisplayMode to drive if a ViewController should use large title or not.
I thought first that .automatic was here to basically only give a largeTitle to the first item of your navigation. So if you start with FirstViewController then it will use a large title but if you navigate to SecondViewController it will use a small title. Same, if you present SecondViewController as a modal it then use a large title. But it’s not the case.
Convenience
Wrapping these two casess together, I added an extension to UIViewController:
extension UIViewController {

    func setLargeTitleDisplayMode(_ largeTitleDisplayMode: UINavigationItem.LargeTitleDisplayMode) {
        switch largeTitleDisplayMode {
        case .automatic:
              guard let navigationController = navigationController else { break }
            if let index = navigationController.children.firstIndex(of: self) {
                setLargeTitleDisplayMode(index == 0 ? .always : .never)
            } else {
                setLargeTitleDisplayMode(.always)
            }
        case .always, .never:
            navigationItem.largeTitleDisplayMode = largeTitleDisplayMode
            // Even when .never, needs to be true otherwise animation will be broken on iOS11, 12, 13
            navigationController?.navigationBar.prefersLargeTitles = true
        @unknown default:
            assertionFailure(“\(#function): Missing handler for \(largeTitleDisplayMode)”)
        }
    }
}
You can see that .automatic is now a bit different in term of logic, you might want to exclude this case and not allow it because it can be confusing. I choose to change the logic (which might be surprising and un-expected for other developers so be careful) to override to use .always only for the first item of the navigation and .never for the rest of the time. That allow you to use your SecondViewController as a modal which will also be using a large title when needed.
In the documentation, it’s says that largeTitleDisplayMode is only used when available. I’m not sure what are the constraints except the OS version (introduced since iOS11) but with this convenience method you can add a bit more logic to only use a large title when:
- Users has a 4.7” screen so that users with iPhone SE will never have a large title that will take too much space.
- Users using a UIContentSizeCategory that is not bigger than .extraExtraExtraLarge will not have large title for the same reason
private func isLargeTitleAvailable() -> Bool {
        switch traitCollection.preferredContentSizeCategory {
        case .accessibilityExtraExtraExtraLarge,
             .accessibilityExtraExtraLarge,
             .accessibilityExtraLarge,
             .accessibilityLarge,
             .accessibilityMedium,
             .extraExtraExtraLarge:
            return false
        default:
            /// Exclude 4” screen or 4.7” with zoomed
            return UIScreen.main.bounds.height > 568
        }
    }
Other things you might want to take a look or be aware of is to exclude setting large title display mode on a ViewController that is used as a ChildViewController.
Repo
You can find all examples illustrated in a project here
What about SwiftUI?
You shouldn’t be having this issue since the way to tell SwiftUI that we want to display a large title is by wrapping our view in a NavigationView where inside your View will use .navigationBarTitle(“First”, displayMode: .large) or .navigationBarTitle(“Second”, displayMode: .inline so you don’t need to care about prefersLargeTitles.